3. Create my first job
Requirements
- You are an ADMIN user on your account.
- You have created the Demo Products table on your account. View tutorial
- VS Code extension is installed. View tutorial
What you will learn
- Create and package a job in VS Code
- Import and run a Job in Product-Live
Create a new job
Open VS code, then create a folder Tutorials, and then right click on the folder and click on Create Job
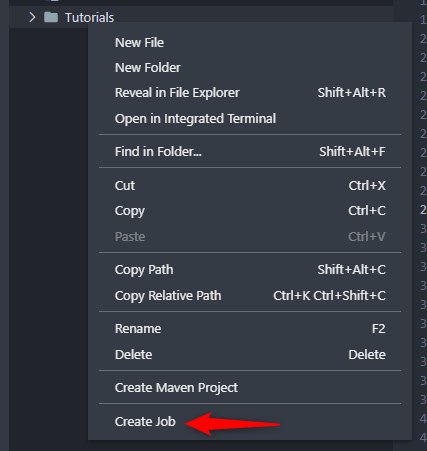
For now we will use the empty template. Later you will see how to use the other templates. Select the empty template:
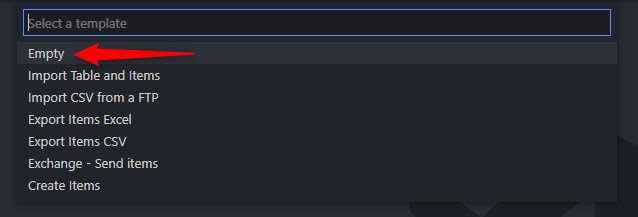
Enter a job title, for example: My first job

This will create a folder like this:
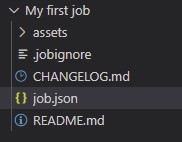
| File/Folder | Description |
|---|---|
| assets | A folder that will contain all the files used for your job (xslt, templates...) |
| assets/TESTS | A folder containing only the test files (for example when you need to test an xslt file with an input xml file) |
| .jobignore | A file defining the files that must not be imported when the job is executed |
| CHANGELOG.md | A markdown file where you should log every updates of your job |
| job.json | A json file defining tasks that must be executed |
| README.md | A markdown file where you should write about your job from a business point of view |
The file job.json looks like this:
json
{
    "schema": "1.0",
    "key": "unique-job-key-in-your-account",
    "title": "My job title",
    "tasks": [],
}
1
2
3
4
5
6
2
3
4
5
6
json
{
    "schema": "1.0",
    "key": "unique-job-key-in-your-account",
    "title": "My job title",
    "icon": "file-add",
    "titleLocal": {
        "fra": "Le titre de mon job"
    },
    "description": "Description of the job",
    "descriptionLocal": {
        "fra": "La description du job"
    },
    "userInputs": [],
    "tasks": [],
    "outputParameters": {}
}
1
2
3
4
5
6
7
8
9
10
11
12
13
14
15
16
2
3
4
5
6
7
8
9
10
11
12
13
14
15
16
| Property | Description |
|---|---|
| schema | Set 1.0 |
| key | The unique key name of your job in your account |
| title | The name that will be displayed to users |
| icon | optional ENUM: the icon that will be displayed to users. Use the autocomplete in the vscode extension to get the full list |
| titleLocal | optional An object for localization |
| description | optional The description of the job |
| descriptionLocal | optional An object for localization |
| userInputs | optional A form of inputs that will be displayed to users |
| tasks | An array of tasks |
| outputParameters | optional Outputs that will be visible or downloadable from users |
Add a task
To add a task, click on the array, press Enter and press Ctrl + Space, this will display the list of available tasks.
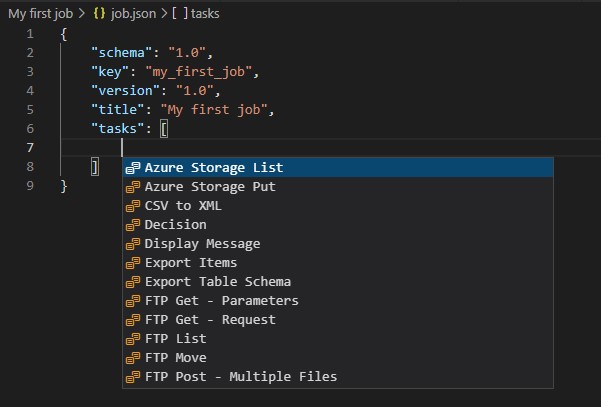
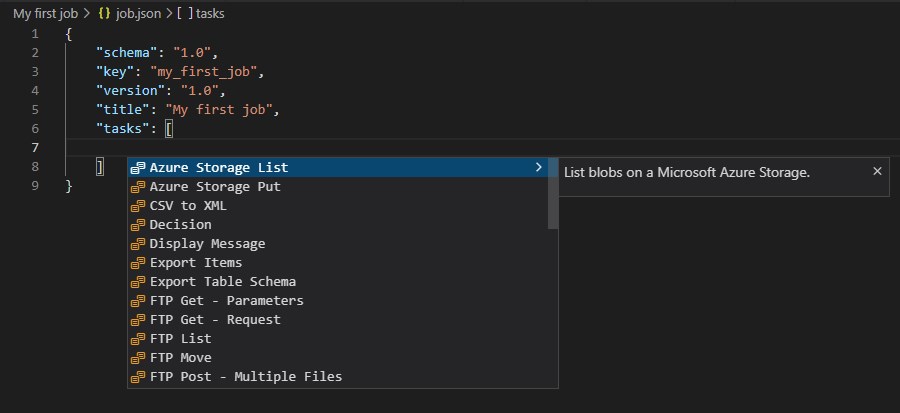
For each task you can display the documentation of the task by clicking here:
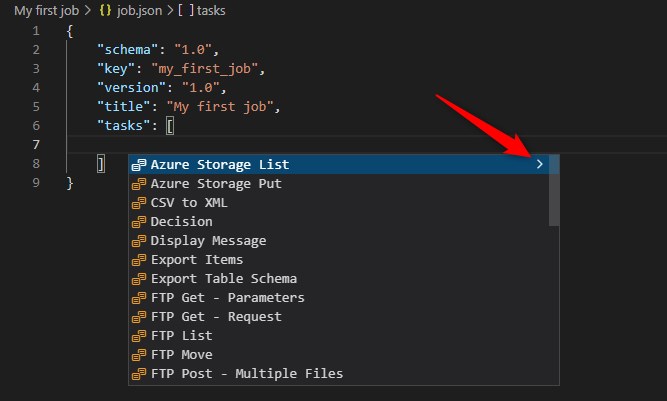
For now we will use the Export Items task. You can select the task or start typing "Export ite" this will reduce the list.
Press Enter, you must have:
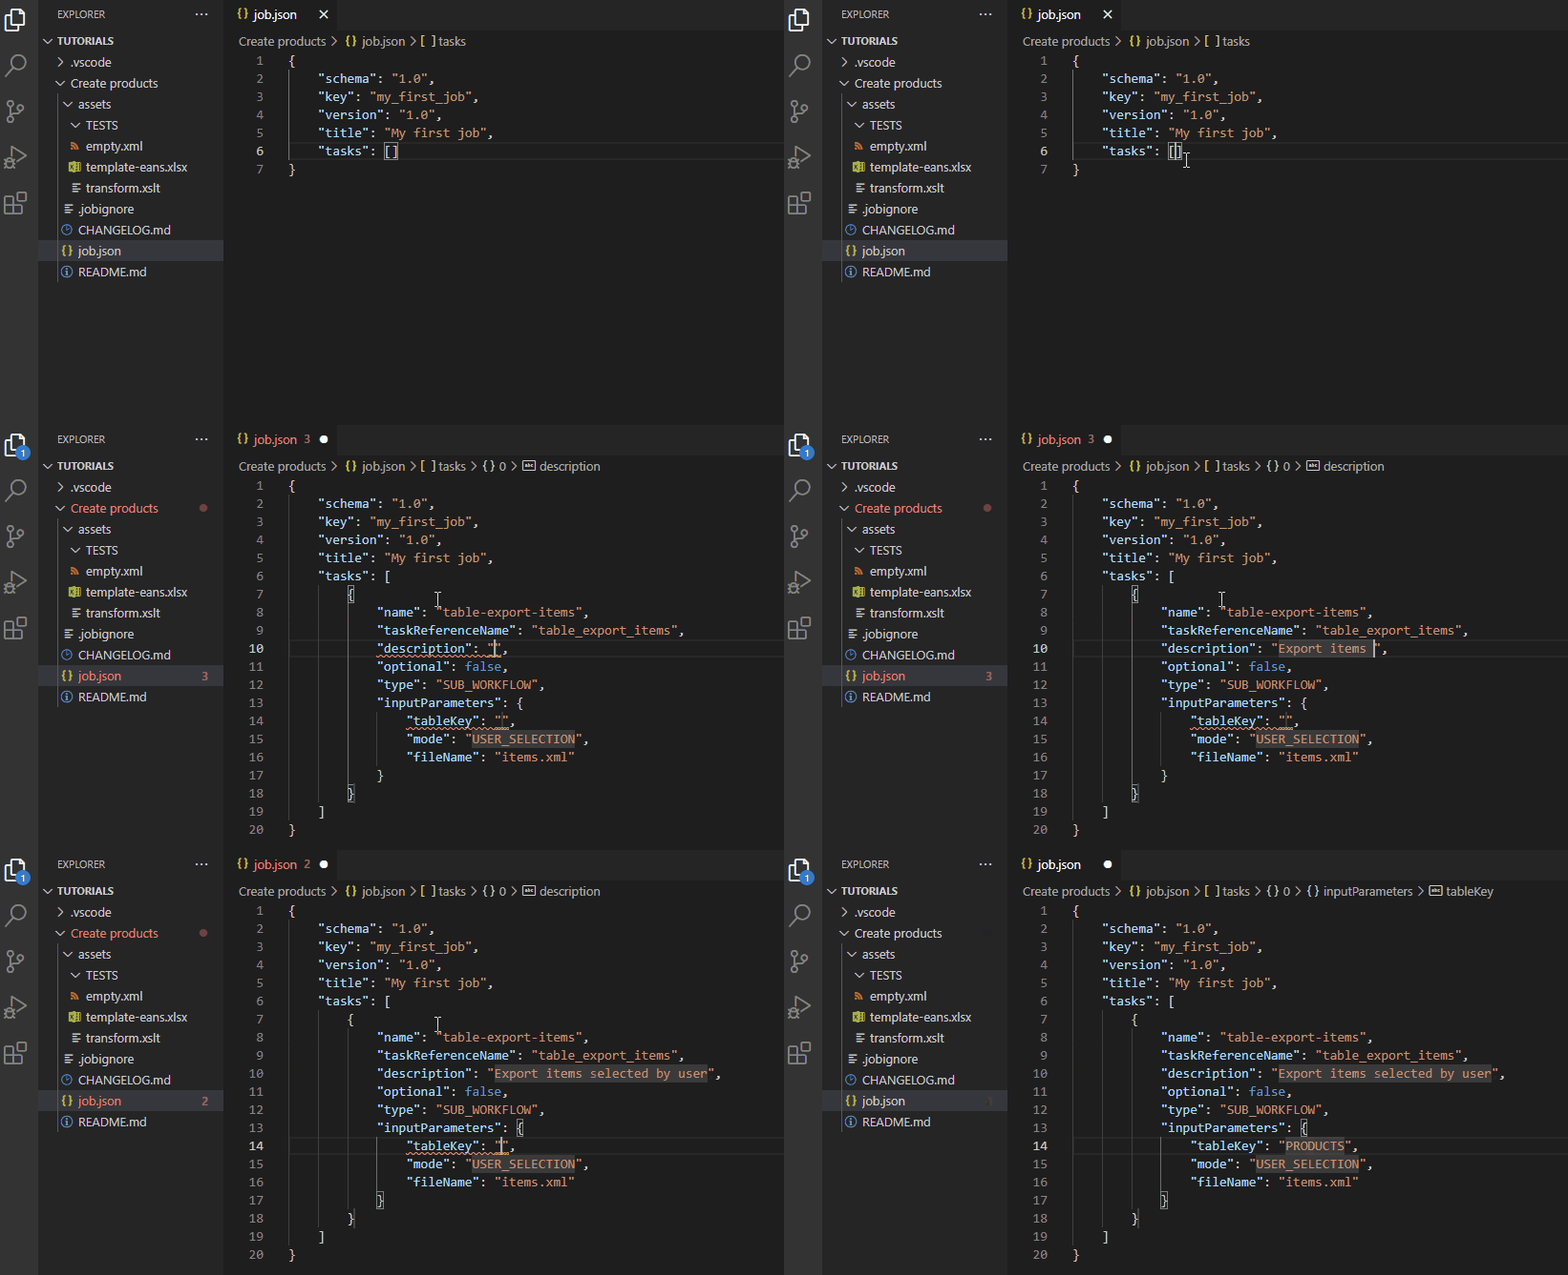
Tip
- Use
Tabkey to jump to the next placeholder, you don't need to use the mouse. - When you will start to know the task names, you will not necesserly need to use
Ctrl + Space, you can start typing the task name and the autocomplete will popup.
Each task has his own properties, to get the full documentation of each task view Tasks. To get the documentation of the Export Items task you can click this link: Export Items.
You can also access the documentation of each properties by hovering the property with the mouse
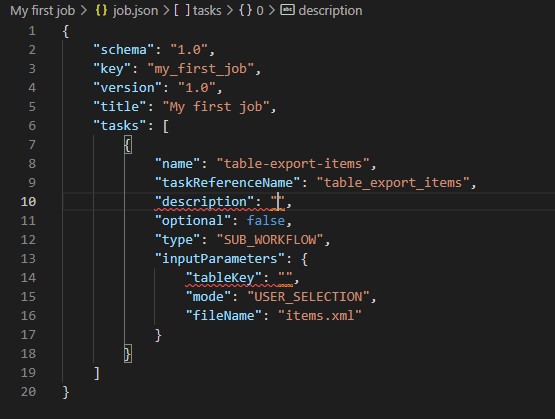
Invalid properties are underlined. To view the error, hover the mouse over the error
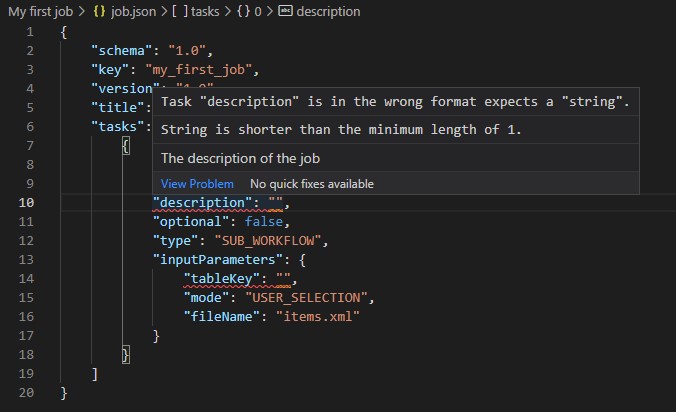
You can also view all the problems on your Job with the PROBLEMS tab

For now, set the description and the tableKey like below:
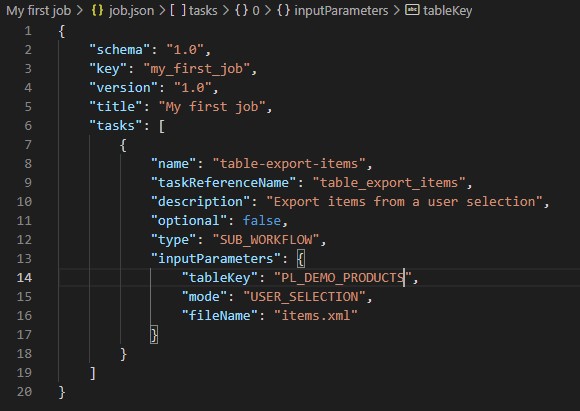
tableKey: "PL_DEMO_PRODUCTS"is the key of the table you have imported in the previous tutorial.mode: "USER_SELECTION"allows to export items selected by the user. Later in the tutorials you will read the full documentation of the task Export Items.
Best pratice
Use the README.md file to describe what your job do and use the CHANGELOG.md file to log changes.
Package the job
Save the file job.json, and now your first job is ready to be packaged! To package a job, right click on the job.json file, and click on Package Job
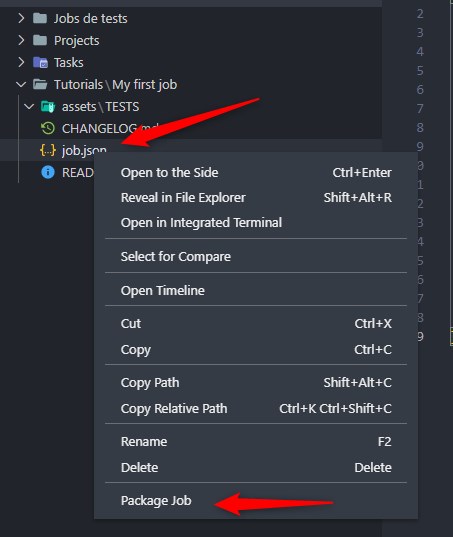
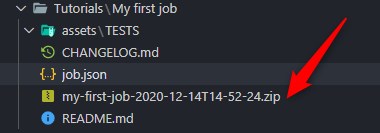
This will create a zip file containing all the informations of your job.
Tip
To access the zip file you have created, right click on this file and click on Reveal in file explorer. This will open a new explorer window from which you will be able to drag and drop the file in Product-Live.
Import the job in Product-Live
Create the job and for this job select Visibility = Visible for selected tables and select the Demo products table.

If you don't remember how to import a job, view this tutorial
Use the Job
Go to https://app.product-live.com and refresh the application using Ctrl + Shift + R.
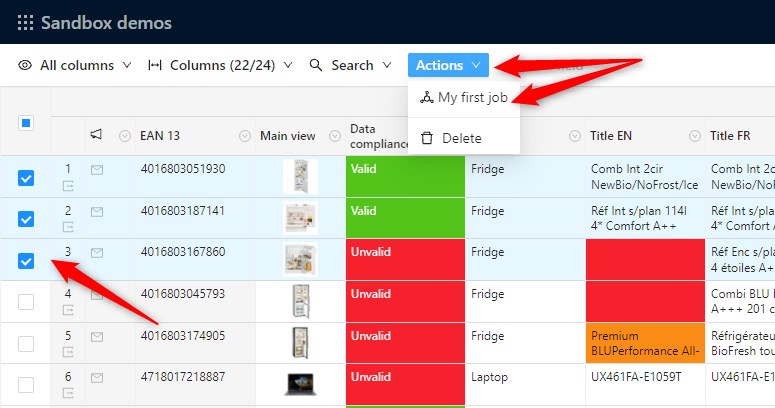
Then select the first three products and click Actions > My first job
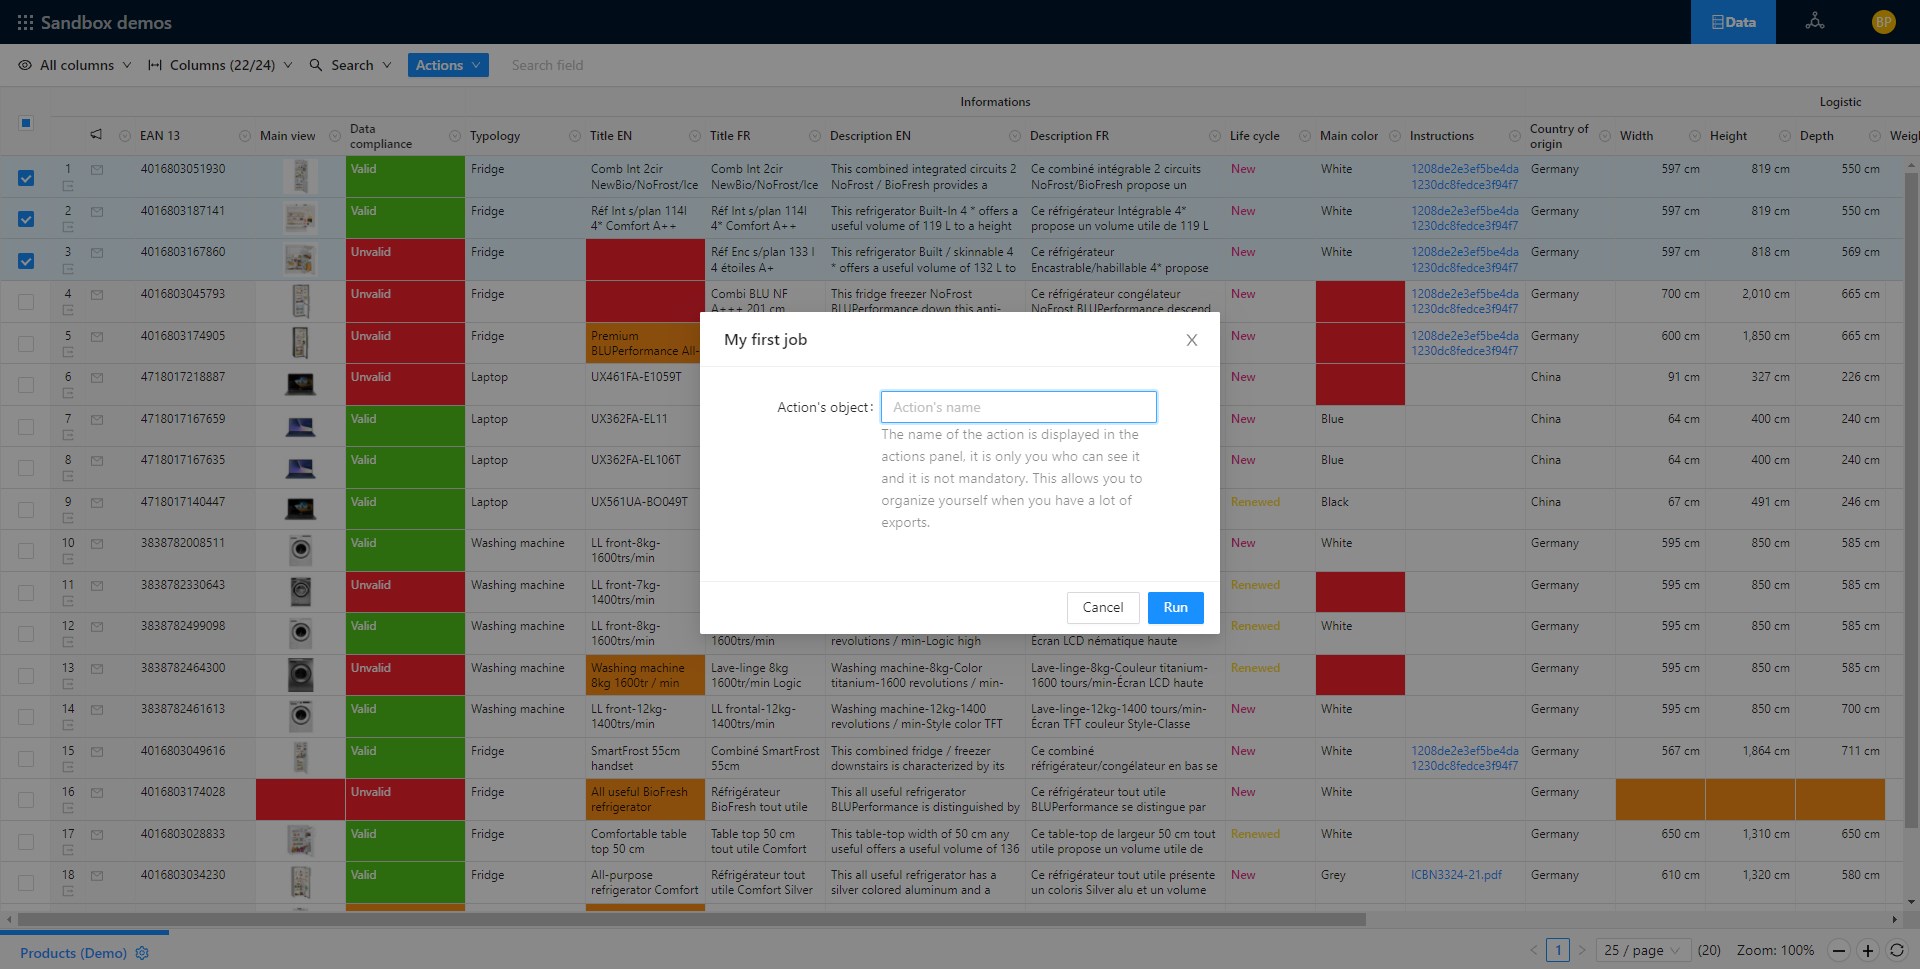
This will open a modal asking an action name. It is nos required to fill this field here, it is usefull when you will execute several Jobs, we will see it later, for now just click on Run button.
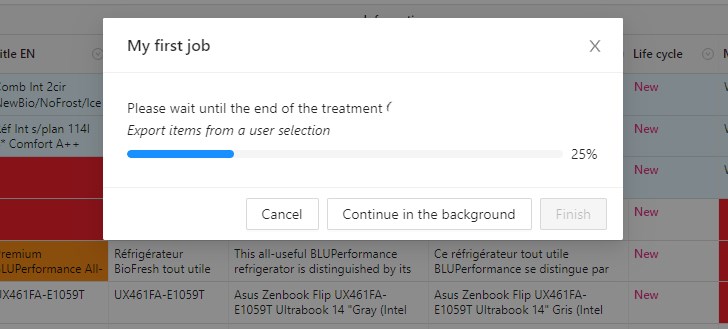
The during the Job execution you can view all the progress step by step.
When the Job execution is processed you have a success message. For now the result of the Export Items task is not downloadable, we will see in another tutorial how to define which outputs can be downloadable from users.
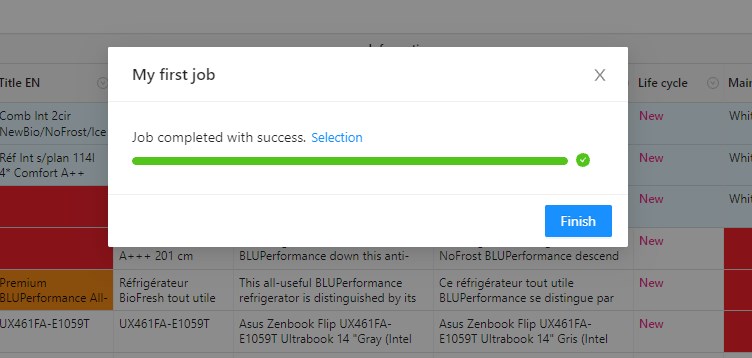
You can click on the Finish button to close the modal.
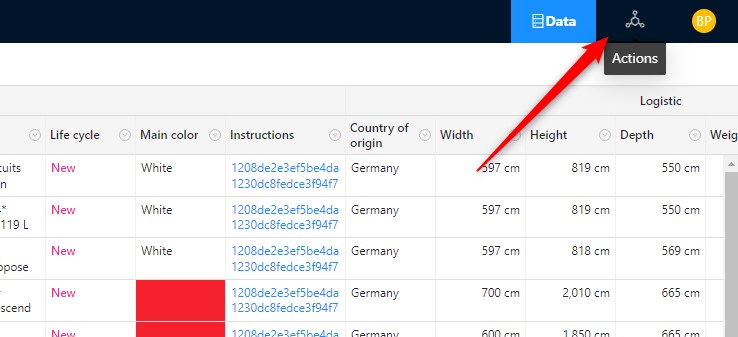
The history of all Jobs executed from the current user is accessible with the Actions panel:
And then a complete history of the tasks executed from the current user is displayed:
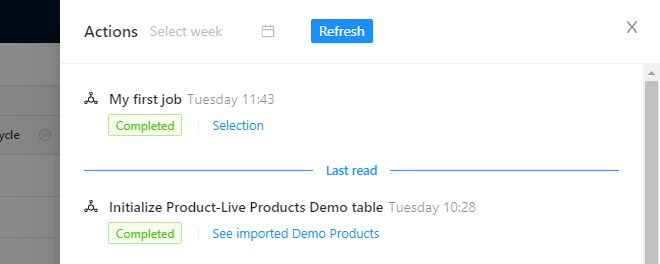
The link Selection allows to view which lines have been selected for this Job.
Tip
During the execution of the Job, you can also click on the button Continue in background, the Job will be executed in background and you can continue to work in the application, and then view the result in the Actions panel.
What you have learned
Jobs are easy to create with the extension
Next
You will learn how to Wire inputs and outputs of tasks.